
One of my clients recently had an issue where a particularly high profile user (CEO) had their title spelled incorrectly in Active Directory; unfortunately the error wasn’t noticed right away and now, despite changing the information in Active Directory, SharePoint was still showing the wrong title in the People Picker when granting the user rights to a Site Collection. Fortunately I had a partial PowerShell script to fix the issue and just needed to only slightly modify it – you can see the original script on pages 299 and 300 of my book. So before I show the modified script it’s first important to understand the problem and why I needed to use a script and why what I had in the book is somewhat incomplete.
Whenever you grant a user rights to a Site Collection or when that user creates/updates/deletes any item within a Site Collection, an entry for the user will be added to a hidden user information list, if not already there. This “User Information List” is located at http://<SiteCollectionUrl>/_catalogs/users/detail.aspx:
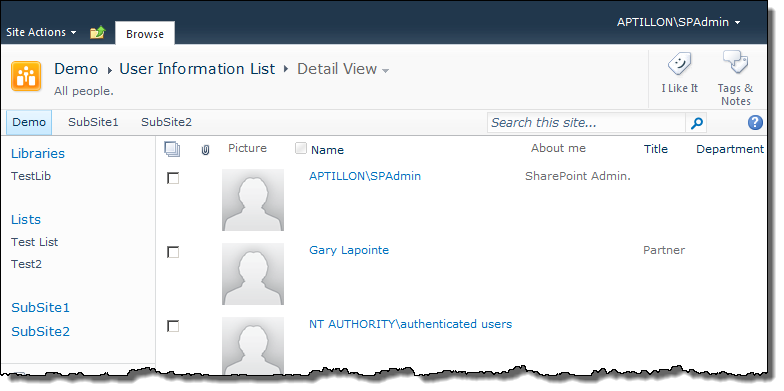
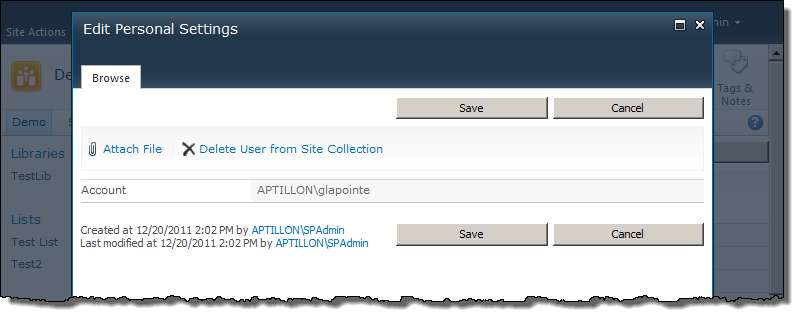
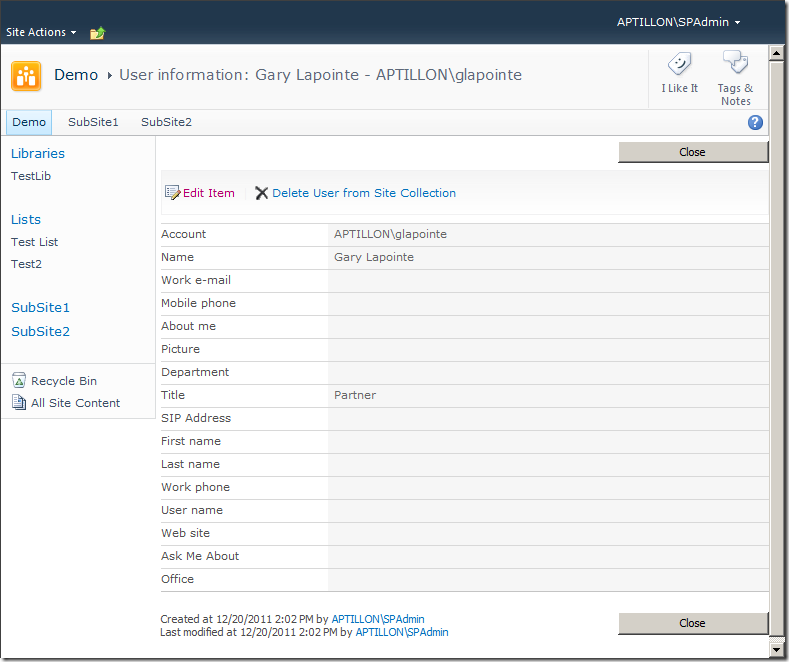
By looking at this list you can see that several key pieces of information are stored here – unfortunately, when you change this information in Active Directory the information stored here is not updated (even after running a full or incremental import via UPS). To complicate matters there is no way to edit the information via the browser, thus the need for a PowerShell script. If you click the user’s name you’ll see the additional properties, including an “Edit Item” option, however, the edit dialog is simply a read-only display of the username, helpful right?:
So let’s first consider the scenario that my book addresses and assume that a user had had their name and/or email address changed. To accommodate this scenario we simply use the Set-SPUser cmdlet along with the -SyncFromAD parameter. The following script is taken directly from my book and simply iterates through all Site Collections and calls the Set-SPUser cmdlet for the provided user:
 1function Sync-SPUser([string]$userName) {
 2  Get-SPSite -Limit All | foreach {
 3    $web = $_.RootWeb
 4    if ($_.WebApplication.UseClaimsAuthentication) {
 5      $claim = New-SPClaimsPrincipal $userName -IdentityType WindowsSamAccountName
 6      $user = $web | Get-SPUser -Identity $claim -ErrorAction SilentlyContinue
 7    } else {
 8      $user = $web | Get-SPUser -Identity $userName -ErrorAction SilentlyContinue
 9    }
10    if ($user -ne $null) {
11      $web | Set-SPUser -Identity $user -SyncFromAD
12    }
13    $web.Dispose()
14    $_.Dispose()
15  }
16}
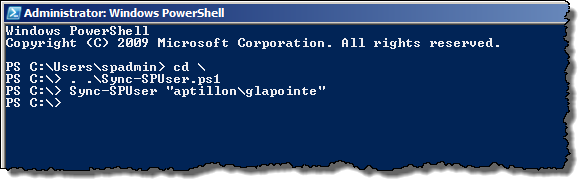
Before I make any changes to demonstrate this script and the modifications we’ll make to it, let’s first see how my user is currently set in the Site Collection:
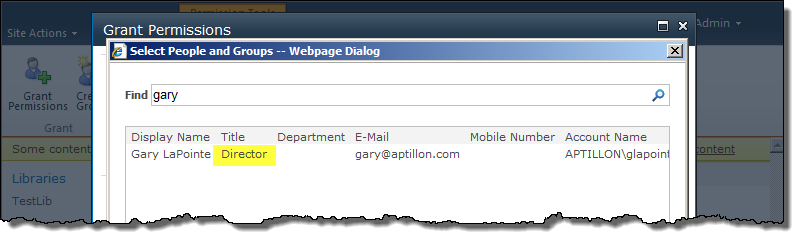
And as shown in the People Picker:
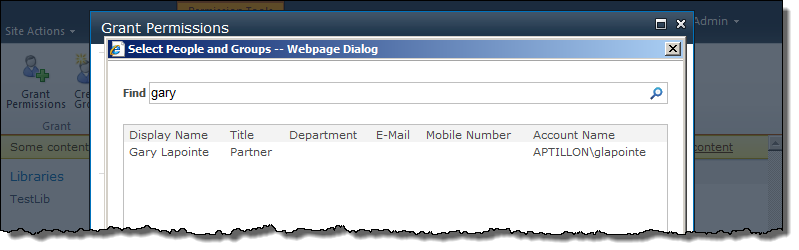
Note the “Name”/“Display Name”, “Work e-mail”/“E-Mail”, and “Title” fields.
Now I’ll change these values in Active Directory (make the “p” in my last name capitalized, change the title, and set the email) and then run the script (I saved the script as Sync-SPUser.ps1):
(Note that lowercase “p” is the correct spelling for my name, just in case you were wondering  ). Now if we look at the user details in the Site Collection and the People Picker we should see the following:
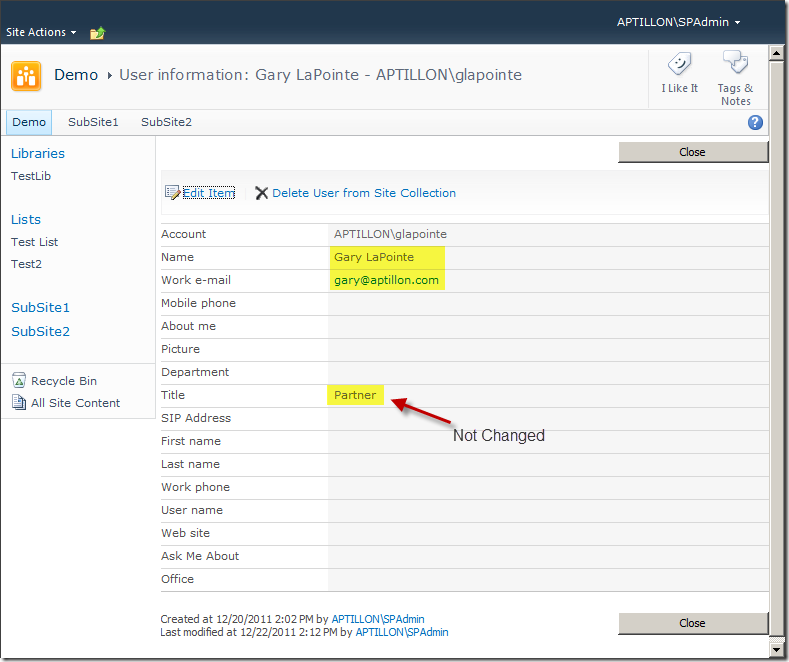
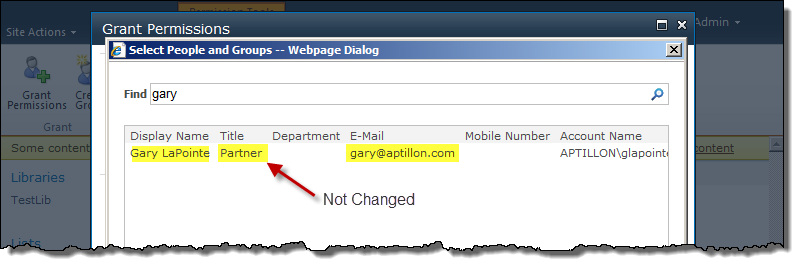
Notice that the the “Name” / “Display Name” and “Work e-mail” / “E-Mail” fields were updated but not the “Title” field. This is because the Set-SPUser cmdlet and -SyncFromAD parameter only updates these two fields. So how do you update the remaining fields? We simply need to add some code to our function which will grab the SPListItem corresponding to the user from the hidden “User Information List” and then update the corresponding fields manually. The following modified script does this for the “Title” field (note that I’ve changed the function signature to take the title in as a parameter):
 1function Sync-SPUser([string]$userName, [string]$title) {
 2  Get-SPSite -Limit All | foreach {
 3    $web = $_.RootWeb
 4    if ($_.WebApplication.UseClaimsAuthentication) {
 5      $claim = New-SPClaimsPrincipal $userName -IdentityType WindowsSamAccountName
 6      $user = $web | Get-SPUser -Identity $claim -ErrorAction SilentlyContinue
 7    } else {
 8      $user = $web | Get-SPUser -Identity $userName -ErrorAction SilentlyContinue
 9    }
10    if ($user -ne $null) {
11      $web | Set-SPUser -Identity $user -SyncFromAD
12
13      $list = $web.Lists["User Information List"]
14      $query = New-Object Microsoft.SharePoint.SPQuery
15      $query.Query = "<Where><Eq><FieldRef Name='Name' /><Value Type='Text'>$userName</Value></Eq></Where>"
16      foreach ($item in $list.GetItems($query)) {
17        $item["JobTitle"] = $title
18        $item.SystemUpdate()
19      }
20    }
21    $web.Dispose()
22    $_.Dispose()
23  }
24}
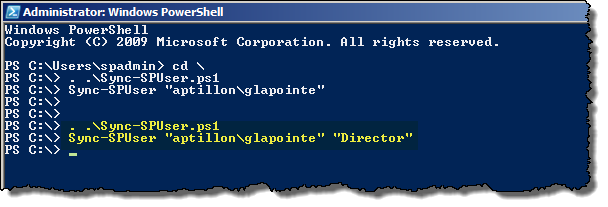
The changes to the original function have been highlighted. Note that the internal field name for the “Title” field is “JobTitle” and that is what we are using to set the Title. Now if we run this modified script we should see the Title field updated:
Okay, so what about the other fields (Department, Mobile Number, etc.)? You can see what fields are available to edit by running the following:
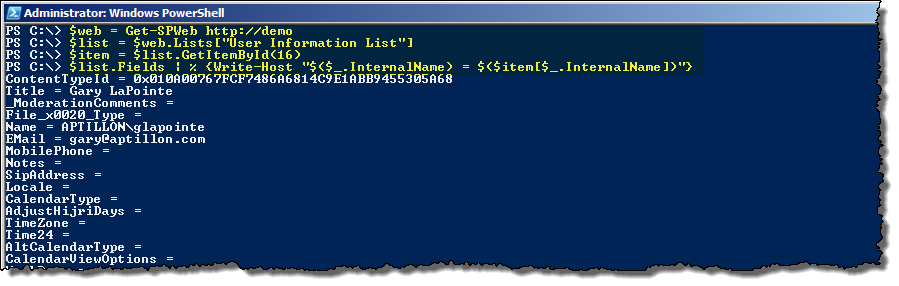
In the preceding example I’m grabbing a specific item (in this case the item corresponding to my user) so that I can see the internal field names in context with the data stored by the field – this helps to make sure that I grab the correct field name (i.e., “JobTitle” vs. “Title”). Now you can just add additional fields to update right before the call to SystemUpdate() – simply follow the pattern established for the title field.
So, add this guy to your script library and you’ll be good to go next time someone changes their name, email, or job title.
-Gary