
Update 10/25/2017: This article originally appeared on ITUnity.com but as that site has been decommissioned I’ve republished it here.
With Office 365 now on SharePoint 2013, we finally have the long-awaited, and long-overdue support for using Windows PowerShell to manage SharePoint Online environments. Though support is still shockingly limited, it is a step in the right direction. For those of us managing large SharePoint Online environments, or about to do so, PowerShell scripting definitely beats tediously clicking through the browser interface.
Before you can start working with the SharePoint Online cmdlets you must first download those cmdlets. Having the cmdlets as a standalone download allows you to use any machine to run the cmdlets. All you have to do is make sure you have PowerShell V3 installed along with the .NET Framework v4 or better. Again, because this is a standalone installation there’s no need to have a SharePoint on-premises farm available.
You can download the cmdlets at the following link: http://www.microsoft.com/en-us/download/details.aspx?id=35588. Once you have installed the cmdlets, a shortcut to the SharePoint Online Management Shell will be added to the Start menu. Just like with the SharePoint Management Shell for on-premises deployments, the SharePoint Online Management Shell is just a standard PowerShell window.
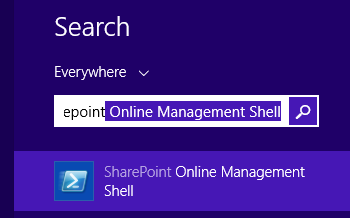
Figure 1: SharePoint Online Management Shell
When you click the SharePoint Online Management Shell shortcut, it loads the installed Microsoft.Online.SharePoint.PowerShell module into a standard PowerShell console window. You can see this by looking at the Target property of the shortcut; the Target property will run the following command:
powershell.exe -NoExit -Command "Import-Module Microsoft.Online.SharePoint.PowerShell -DisableNameChecking;"
As you can imagine, if all the shortcut is doing is loading the module, then clearly you can use any PowerShell console window or script editor by manually loading the module. This is done by calling the Import-Module cmdlet and passing in the name of the module to load. Now technically, because PowerShell V3 has the ability to auto-load modules, you don’t actually have to explicitly load the module as simply attempting to run any of the installed cmdlets will load it for you; however, I always recommend that you explicitly load the module so that calls to Get-Command will return the SharePoint Online cmdlets without the need to pass in the module name. When you do load the module, you will likely get a warning about cmdlets using unapproved verb names, specifically the Upgrade verb. You can suppress this warning by providing the -DisableNameChecking parameter to the Import-Module cmdlet.
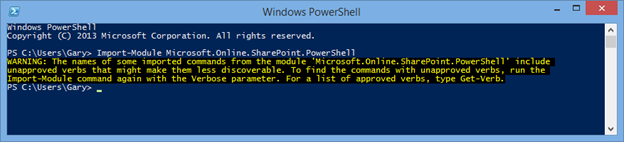
Figure 2: Loading a module gives you a warning about cmdlets using unapproved verb names
If you’re familiar with how the on-premises version of SharePoint works, then you’ll know that you need to ensure that PowerShell’s thread options are set to enable thread re-use. With the SharePoint Online cmdlets, however, there is no need to worry about this because none of the objects returned by any of the cmdlets require disposal. When working with SharePoint on-premises you often end up interacting with objects such as the Microsoft.SharePoint.SPSite or Microsoft.SharePoint.SPWeb objects, to name just the two most popular (there are many others). These objects leverage a rather heavyweight, unmanaged COM object that must be explicitly cleared from memory. With PowerShell V2 (the only supported version of PowerShell that works with SharePoint 2010), the default behavior is to instantiate a new thread every time you hit the Enter key in the PowerShell console. As a result, if you don’t change the $host.Runspace.ThreadOptions property to ReuseThread then calling Dispose() on the SPSite or SPWeb objects will not actually release the memory consumed by the unmanaged COM object. To get around this, the SharePoint 2010 Management Shell changes the thread options in the registration script that it runs to load the snap-in. With PowerShell V3+ the default option is now ReuseThread, however, the SharePoint 2013 Management Shell still explicitly sets the option just in case you have changed the default. But again, you don’t have to worry about any of this when working with the SharePoint Online cmdlets because you are never working with objects that require disposal (at least, no SharePoint objects – you may load other native or third-party libraries that use disposable objects).
Getting connected
Now that you’ve got the SharePoint Online Management Shell installed you are ready to connect to your tenant administration site. This initial connection is necessary to establish a connection context that stores the URL of the tenant administration site and the credentials used to connect to the site.
To establish the connection, use the Connect-SPOService cmdlet:
Connect-SPOService -Url "https://contoso-admin.sharepoint.com" -Credential "admin@contoso.com"
As previously noted, you have to use the URL of your tenant administration site when connecting; an attempt to connect using the URL of one of your Site Collections will throw an error instructing you to use the tenant administration site. Running this cmdlet stores a Microsoft.SharePoint.Client.ClientContext object, or rather a sub-classed version of it, in an internal static variable. Future cmdlet calls then use this object to connect to the site, thereby negating the need to constantly provide the URL and credentials. The downside of this object being internal is that you can’t extend the cmdlets to add your own, unless you want to use reflection which would be unsupported.
To clear this internal variable, and make the session secure against other code that may attempt to use it, you can run the Disconnect-SPOService cmdlet. This cmdlet takes no parameters. You certainly are not required to run this cmdlet when you are done, and I honestly never do when I’m just working directly within the console. However, when I’m creating a script that I or other users will run I always make sure I run the Disconnect-SPOService cmdlet because I want to make sure that the credentials used to connect to my tenant are not accidentally or maliciously used by another script.
Exploring the SPO cmdlets
Unlike the SharePoint on-premises cmdlets, whose nouns all start with SP (e.g., [verb]-SP[noun]), the SharePoint Online cmdlet nouns all start with SPO. You can see the full list of all SharePoint Online cmdlets by passing the Microsoft.Online.SharePoint.PowerShell module name to the Get-Command cmdlet:
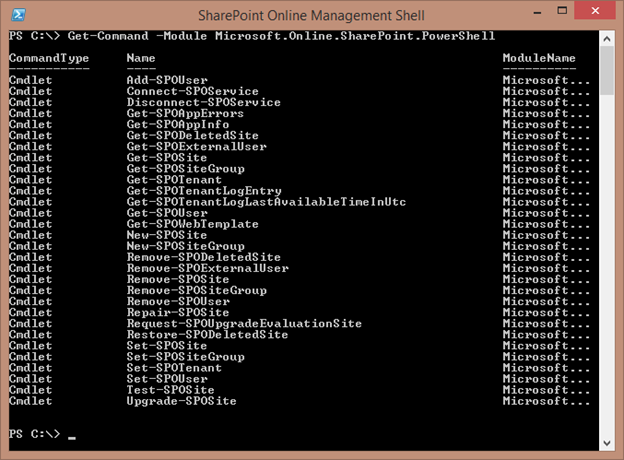
Figure 3: SharePoint Online supports 30 cmdlets
If you run the command you’ll see that only 30 cmdlets are available. Contrast that with the over 800 cmdlets available to a SharePoint on-premises installation, and you can quickly imagine that the set of capabilities with the SharePoint Online cmdlets is pretty limited.
To learn more about the various cmdlets that are available and how to use some of the more common ones, refer to the Exploring the SharePoint Online Cmdlets article and the Working with the SharePoint Online Site Collection Cmdlets article in this series.
Summary
When we look at the top use case for using the SharePoint Online PowerShell cmdlets, in my mind, it’s all about automation of governance around site provisioning and user management. On the surface this is pretty obvious because, with just a couple of exceptions, it’s really all the cmdlets let us do. But knowing what cmdlets are available and what they can do doesn’t mean that you know how to properly take advantage of them. That, in my opinion, is where SharePoint administrators need to better understand the value and importance of governance; doing so will lead you to want to leverage these cmdlets where you might not otherwise even consider them. Subsequent articles will delve deeper into some of the more commonly used cmdlets to that you can better understand how and when to use them.