SPFx for SharePoint 2019 Issues
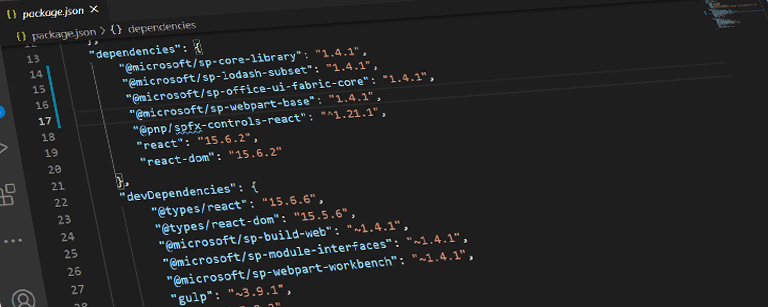
I’ve been working with SPFx for SharePoint Online for quite a while and have done numerous client projects for it but recently I’ve been asked to create a few SPFx web parts that would work on both SharePoint Online (SPO) and SharePoint 2019 (SP2019).
Continue Reading